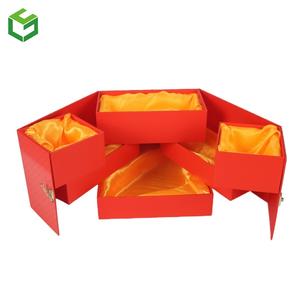
Making a paper gift box is a fun and creative project that you can do yourself. Here's a step-by-step guide on how to make a paper gift box:

Materials you will need:
1).Cardstock or thick paper
2).Ruler
3).Pencil
4).Scissors
5).Glue or double-sided tape
6).Decorative paper or wrapping paper
7).Ribbon or string (optional)
Step 1: Prepare the box template
1).Determine the size of the gift box you want and draw a rectangle on the cardstock or thick paper using a ruler.
2).Add about 1-2 inches to each side of the rectangle to create flaps for folding and gluing.
3).Cut out the template and fold along the lines to create the box shape.
Step 2: Fold and assemble the box
1).With the blank side facing up, fold along the lines to create crisp edges. Use a ruler to make the folds neat.
2).Apply glue or double-sided tape on the flaps and secure the sides of the box, overlapping the flaps where necessary. Press firmly to ensure they stick together.
Step 3: Decorate the box
1).Choose decorative paper or wrapping paper to cover the outside of the box.
2).Cut a piece of paper larger than the box template.
3).Apply glue or double-sided tape on the blank side of the paper and carefully wrap it around the box, smoothing out any wrinkles or bubbles.
4).Trim any excess paper and fold the edges neatly.
Step 4: Add finishing touches
You can embellish the box further by adding ribbons, bows, or other decorative elements. Use glue or tape to attach them securely.
And there you have it! Your own handmade paper gift box is complete. You can customize the size, design, and decorations based on your preferences and the occasion. It's a wonderful way to add a personal touch to your gift-giving. Enjoy crafting!
If you want to promote your own brand, or use it as a practical packaging box for gifts, it is recommended that you find a professional carton packaging company to customize it for you. This will not only meet your needs, but also promote you more s brand.

 English
 Español
 Português
 русский
 français
 日本語
日本語
 Deutsch
 Italiano
 Nederlands
 Polski
 한국어
한국어
 magyar
 বাংলা
বাংলা
 Dansk
Dansk
 Suomi
Suomi
 हिन्दी
 Pilipino
 Türk
Türk
 Gaeilge
 عربى
عربى
 Indonesia
 čeština
 Ελληνικά
 Українська
 Javanese
 فارسی
فارسی
 नेपाली
 ລາວ
ລາວ
 Latine
 Қазақ
Қазақ
 slovenský
 Lietuvos
 Română
 Slovenski
 Српски
 Català
 עִברִית
 Galego
 icelandic
 Shqiptar
 lugha ya Kiswahili
 አማርኛ
አማርኛ
 Kurdî
Kurdî
 Монгол хэл
 Somali
 O'zbek
 Hawaiian
 Lëtzebuergesch
 Malagasy
 Yoruba


